Holiday Extravaganza Project 6
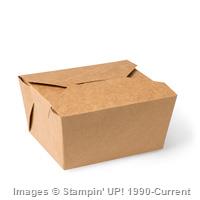
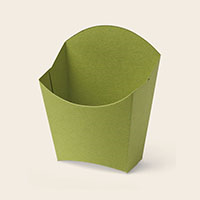
Holiday Extravaganza Project 6! Fry box filled with treats!


Built for Free Using: My Stampin Blog

Holiday Extravaganza Project 6! Fry box filled with treats!
Built for Free Using: My Stampin Blog
Here’s our 5th project from my Holiday Extravaganza!

Built for Free Using: My Stampin Blog
Here’s project 3 from the Holiday Extravaganza! LOVED the snowman tea lights that I CASED from Becky Roberts when she first showed them a couple of years ago! 🙂

As soon as I got My Paper Pumpkin this month, I KNEW what I wanted to do with it! Look at the FUN “pie” project for Thanksgiving!
Our family in a small group bible study. We get together every other week – we eat together and our kids attend with us. Kids hang out in another room, or outside, while we do our study. At the end of the study, all of the adults and kids gather in one room. Each week one of the kids gives a devotion to our whole group. The kids get comfortable sharing with their friends and adults! It’s very informal and low key.
Brady’s turn for the devotion is this week. He wanted a “Thanksgiving” theme, so his lesson is on giving thanks! As “luck” (I call them “Godincidences”, not coincidences) would have it, there are 8 kids in our group. There are 8 pieces of pie! At the end of Brady’s lesson, each kid will get a small piece of paper. They will fill in where it says “I am thankful for ________ (insert each kid’s name) because: ____________________. Each kid will write why they are thankful for that person. We will collect all the pieces of paper and put them into their piece of the pie for them to take home! Each child will have MANY messages to pour over! I will also tuck in some treats in the box, too. What a fun way to use this pie project! This could be done around the Thanksgiving table as well! (I should have bought 2 kits this month!!)
If you haven’t subscribed to My Paper Pumpkin, give it a try! You can sign up HERE. Don’t forget to list me as your demonstrator please! 🙂
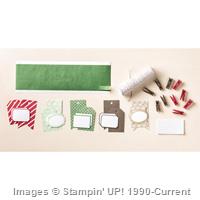
Here are the supplies I used for the Christmas Gift Box
Built for Free Using: My Stampin Blog
I’m so excited to share with you the projects from the Holiday Extravaganza! I’m so sorry I am a little late in posting these, my time was occupied with these two little munchkins, who arrived 7 days apart. These are my brand new grandkids, Stella Rae and Elias Daniel. LOVE THESE TWO SO MUCH!

I’ll start out with our first project. This was a gift bag the ladies made so they could put all their projects inside when they were done with them. The gals got a stack of the beautiful Trim the Tree DSP in their packets so they could make their legs out of any color they wanted. Stay tuned for MORE PROJECTS!


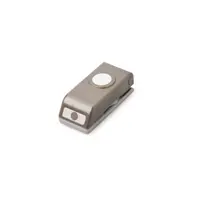
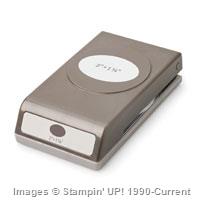
There’s a new product coming out next month called the Gift Box Punch Board! You can make many different sized boxes with it, and it’s so much fun! Here is a small box (2″ square) that my team made tonight at our weSTAMP get together. (I know it’s a little early for Holidays but I couldn’t resist!)
There is also some new holiday cardstock coming out that is VERY STURDY and perfect for making these boxes! You are going to LOVE the Holiday Catty! You can order from it on Aug. 28th.
Here’s one of the Christmas cards I sent this year! My downline, Dawn Caraway, made one like this last year and and I knew I wanted to use this idea (even though this stamp set and framelit is retired, BOOHOO!)
I hope you all had a wonderful Christmas and HAPPY NEW YEAR!
Here’s this week’s DEALS!


That Becky Roberts never stops with her creative ideas! She created these adorable Santa’s! You can find her awesome tutorial HERE. I made a gift card holder to go with them and gave them as Christmas gifts this year.

Look at the deals this week!! WOWZERS! Stock up for next year!

Here’s a Christmas Coffee Cup Gift Tag, made using the stamp set “Very Merry Tags” from the Holiday catalog.
The “to/from” in the top left corner represents the boxes at Starbucks that they check off when they take your order.
This tag is about 4″ tall.
Recipe:
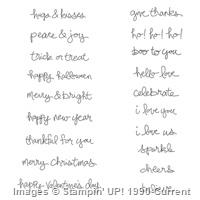
Stamp Set: Festive Flurry, Very Merry Tags, SWAK (retired)
Paper: Whisper White, Cherry Cobbler, Crumb Cake, Primose Petals (lip marks)Ink: Versa Mark, Old Olive, Cherry Cobbler, 7/8″ Scallop Circle Punch, Artisan Punch, Cherry Cobbler Baker’s Twine, Paper Crimper, 1/8″ Hole Punch, Dimensionals
 I was perusing Pinterest one day and saw Michelle Surette do a “play on words” with the stamp set Merry Little Christmas. It says, “Have your ELF a Merry Little Christmas”. I loved that idea! You can see her project HERE. I came up with a card and/or gift tag using that same word play – to go with the elf feet I recently posted HERE.
We made this card in Stamp Club this month! This products were from the Merry Little Christmas Simply Created Card kit. Here’s a photo of how I made the elf feet. It is like a mini version of the Top Note die, but these are made with the Curly Label Punch.
Do you want to join us next month for Stamp Club? Email me if you are interested in attending locally or virtually! 🙂
Recipe:
Stamp Set: Merry Little Christmas
Paper: Coastal Cabana, Real Red, Merry Little Christmas Simply Created Card Kit, Old Olive, Glimmer Red
Ink: Real Red, Coastal Cabana, Old Olive
Accessories: Curly Label Punch, Cherry Cobbler Bakers Twine, Owl Punch

We did a gift exchange at our weSTAMP Christmas party and this is what I came up with. I bought the frame at Hobby Lobby this summer. I wish I would have taken a photo of it before! It was light wood and had tin Hawaiian decorations on it!! I stained the wood darker with Stampin’ Up ink and sponges and took off the tin.
Do do the lettering I made a stencil with my Cameo Silhouette machine and filled in with chalk, then removed the vinyl. LOVE that machine!

This is my “go to” treat this Christmas! These are SO YUMMY! There’s only 4 ingredients! Peppermint oreos, cream cheese, white almond bark, and crushed candy canes! (You can buy the candy canes already crushed at Walmart!) Here’s the recipe link HERE.
Here’s a HO HO HO banner that I made for a door prize at our weSTAMP get together.


I prefer to use the sponge daubers when sponging the banner. The spritzing method recommended didn’t come out very well. The ink ran under the stencil.
Rusty jingle bells are from Hobby Lobby.
Click on photo for upclose look. Sorry such poor lighting in these photos!!!

Lorri Heiling
Independent Stampin' Up! Demonstrator