Holiday Extravaganza Projects 11
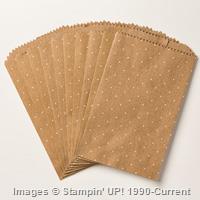
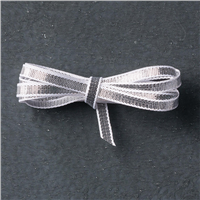
More projects from the Holiday Extravaganza! Guests received a whole pack of Under the Tree Tag a Bag Accessory Kit.


More projects from the Holiday Extravaganza! Guests received a whole pack of Under the Tree Tag a Bag Accessory Kit.

The guests also received the Under the Tree Tag a Bag Accessory Kit in their bundle of goodies!
One of my sidelines (super creative Jennie Portonova!) brought these to our team meeting this week. I KNEW this was what I wanted to make for Brady’s Halloween party!
The card stock is cut to 2 3/4″ x 6″ and scored at 3/4″, 3 1/2″ and 3 3/4″
I cut the pumpkin faces out with my Silhouette machine. Eyes are made with Life Savers and 1/2″ punch
Here are the products used to make both projects!
Built for Free Using: My Stampin Blog
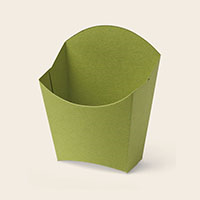
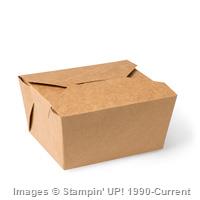
Holiday Extravaganza Project 6! Fry box filled with treats!

Built for Free Using: My Stampin Blog
Here’s project 3 from the Holiday Extravaganza! LOVED the snowman tea lights that I CASED from Becky Roberts when she first showed them a couple of years ago! 🙂

As soon as I got My Paper Pumpkin this month, I KNEW what I wanted to do with it! Look at the FUN “pie” project for Thanksgiving!
Our family in a small group bible study. We get together every other week – we eat together and our kids attend with us. Kids hang out in another room, or outside, while we do our study. At the end of the study, all of the adults and kids gather in one room. Each week one of the kids gives a devotion to our whole group. The kids get comfortable sharing with their friends and adults! It’s very informal and low key.
Brady’s turn for the devotion is this week. He wanted a “Thanksgiving” theme, so his lesson is on giving thanks! As “luck” (I call them “Godincidences”, not coincidences) would have it, there are 8 kids in our group. There are 8 pieces of pie! At the end of Brady’s lesson, each kid will get a small piece of paper. They will fill in where it says “I am thankful for ________ (insert each kid’s name) because: ____________________. Each kid will write why they are thankful for that person. We will collect all the pieces of paper and put them into their piece of the pie for them to take home! Each child will have MANY messages to pour over! I will also tuck in some treats in the box, too. What a fun way to use this pie project! This could be done around the Thanksgiving table as well! (I should have bought 2 kits this month!!)
If you haven’t subscribed to My Paper Pumpkin, give it a try! You can sign up HERE. Don’t forget to list me as your demonstrator please! 🙂
Here are the supplies I used for the Christmas Gift Box
Built for Free Using: My Stampin Blog
I LOVE my TEAM! In fact, I love them so much that I truly enjoy hosting “weSTAMP Regionals” just for them! It’s a full day spent making projects, training, demonstrations, PRIZE PATROL, games, and enjoying a lot of displays! I host these about every quarter and they are for everyone who is on my team. Even the out of towners can participate, and receive the GOODIE BAG containing products and projects to be completed that day.


 Here are the bags and the water bottles that everyone received. One of my downline, Sue Parker, is the MDS Queen and helped with anything that had to do with MDS that day! Name tags, bag tags and water labels! THANK YOU SUE!


I am blessed by my team mates, they truly are such wonderful friends to me!


I’ll be sharing some of our projects that we made that day. Here is one of the favorites, Frankie out of the French Fry box! I’m sure you’ve seen many of these on Pinterest. That’s where I got the idea. I added a cello bag (actually it’s a cello envelope with the top cut off!) with some Hershey kisses inside along with some plastic bugs. The tag says “Bugs and Kisses” for a play on words.
Would you like to JOIN THE FUN? You can also be included in these types of events and MORE! I would love to have you join my team of weSTAMPERS. By joining my community, you can purchase your Stampin’ Up products at wholesale prices. You aren’t obligated to hold workshops or classes either! We have a private website and Facebook page to interact with other team members. Let’s chat and get you started! You can also go to my website and sign up HERE.

There’s a new product coming out next month called the Gift Box Punch Board! You can make many different sized boxes with it, and it’s so much fun! Here is a small box (2″ square) that my team made tonight at our weSTAMP get together. (I know it’s a little early for Holidays but I couldn’t resist!)
There is also some new holiday cardstock coming out that is VERY STURDY and perfect for making these boxes! You are going to LOVE the Holiday Catty! You can order from it on Aug. 28th.


I was inspired by a card on Pinterest that looked like a cosmetic bag, so i turned that idea into a BOX filled with goodies! I gave some of these out at Convention this year. They were so fun to make! Some of the cut out shapes I downloaded from the Silhouette store.
The outside tag is a compact that opens out with a sentiment (on silver cardstock)
Today I leave for CONVENTION! I’m so excited to see many familiar faces AND to have many of my weSTAMP team members join me!
To start things off, we have a team get together, along with Becky Robert’s team. This year we are doing some make and takes at our event. This is what the gals made. The one to the right holds 2 Hershey nuggest in the candy holder.

Each team member got a gift for attending – here it is!

Inside the box are some Hodgepodge clips.
MORE Convention photos will follow!

I have been having fun making these mini suitcases for a variety of events! This top suitcase looks retro to me! We made this at my weSTAMP Founder’s Circle event. The DSP is from the new catty. It is called All Abloom and is in a 4 1/2″ x 6 1/2″ stack. You can put Hershey Nuggets, a gift, card, or many other items inside the suitcase!
The suitcases below are ones I made for some friends on the Stampin’ Up incentive trip. I added the logo for the “Grand Vacation” plus travel stickers (just downloaded them off the internet) of the ports we cruised to.


I got the pattern for the suitcase from the Silhouette online store. Hope you enjoy!


Here’s a card and gift for the end of the school year! I made the card using my Cameo Silhouette machine and downloaded the desk card from there.
The bus (which holds treats or a gift card in the back end) tutorial can be found HERE.

Here’s a K-Cup holder I made earlier this year – I love fun ways to give practical things!
I found this pattern by Lori Techler HERE.
I used the DSP called Retro Fresh, which is in the Spring Occasions catalog! You can get it now if you order before June 2nd. I love this DSP, it’s so versatile and the colors are beautiful!

Last weekend I had the PRIVILEGE to spend time with Becky Roberts and her family! 🙂 Becky hosted an event called Inking Idaho on the Road. It was AMAZING, and I was so blessed to be there! For more photos, please visit Becky’s blog HERE – you will be amazed! I did a presentation for her event and will share my projects, but I want to do a video of what I came up with. It will be much easier to explain it in a video!
Here’s a little something I created as a thank you to Becky. I used her Inking Idaho logo to inspire me on this shadow box idea. I used the Wedding/Anniversary tutorial found on my blog HERE, but adjusted the pattern and made it 3/4″ wide so it would fit in the shadow box.


Lorri Heiling
Independent Stampin' Up! Demonstrator